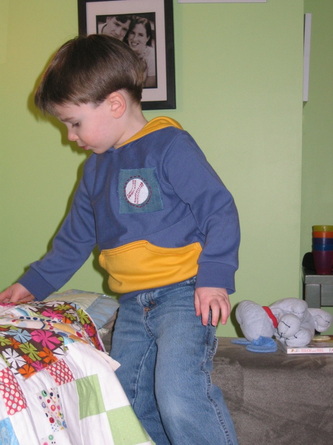
When Bonnie from Fishsticks Designs asked me if I wanted to try her great Charlie Tee & Hoodie pattern , I jumped at the chance! I’m always looking for toddler boy sewing ideas. (On that note, don’t forget to check in at Dana Made It for Celebrate the Boy Month!)
Anyway, Bonnie sent me this pattern for free, but I’m under no obligation to give it a glowing review. I don’t need obligation: this handy little pattern sells itself! I truly, truly love it and I think it’s probably my favorite thing I’ve made for Max so far.
Anyway, Bonnie sent me this pattern for free, but I’m under no obligation to give it a glowing review. I don’t need obligation: this handy little pattern sells itself! I truly, truly love it and I think it’s probably my favorite thing I’ve made for Max so far.
The Pattern
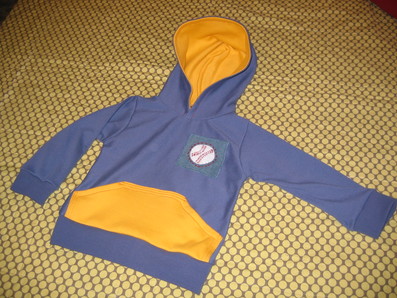
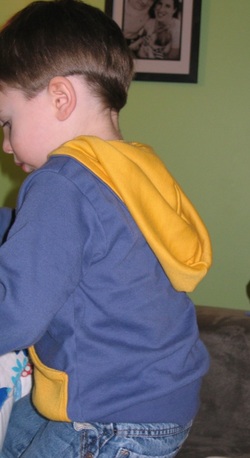
The pattern presentation isn’t fancy (a manila envelope with black and white sheets) [little update here: Bonnie just changed out the packaging! See it here!], but that’s unimportant to me. I’m after functionality and a good pattern, and this definitely delivers. First, it’s about five different patterns in one, because you can customize it for what you want: a plain tee (long or short sleeves), a color-blocked tee, or a hoodie (either outerwear or more like a tee-shirt). I chose the tee-shirt hoodie option, because I wanted Max to have something to wear around for spring that wasn’t too heavy.
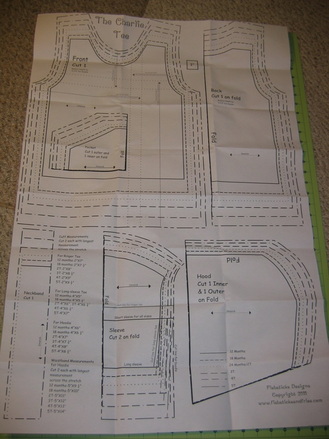
She offers the patterns in different sizes (all the way up to adult), and my pattern is for infant/toddlers. There are six sizes: 12M, 18M, 24M/2T, 3T, 4T, 5T
It comes with one big sheet of paper, with all of the sizes clearly printed. The best method is to trace the size you’re making. This way, you don’t have to deal with cumbersome paper when cutting out, and also, you can re-use (I anticipate using this pattern for many years as Max grows!). I used Pellon True-Grid (I just buy this by the bolt at Jo-Ann’s).
The pattern presentation isn’t fancy (a manila envelope with black and white sheets) [little update here: Bonnie just changed out the packaging! See it here!], but that’s unimportant to me. I’m after functionality and a good pattern, and this definitely delivers. First, it’s about five different patterns in one, because you can customize it for what you want: a plain tee (long or short sleeves), a color-blocked tee, or a hoodie (either outerwear or more like a tee-shirt). I chose the tee-shirt hoodie option, because I wanted Max to have something to wear around for spring that wasn’t too heavy.
She offers the patterns in different sizes (all the way up to adult), and my pattern is for infant/toddlers. There are six sizes: 12M, 18M, 24M/2T, 3T, 4T, 5T
It comes with one big sheet of paper, with all of the sizes clearly printed. The best method is to trace the size you’re making. This way, you don’t have to deal with cumbersome paper when cutting out, and also, you can re-use (I anticipate using this pattern for many years as Max grows!). I used Pellon True-Grid (I just buy this by the bolt at Jo-Ann’s).
The Directions
The directions are very clear. I admit, I didn’t always read them word for word because once you know how to do something your way, you just go ahead and do it without really checking (though I don’t think my way differed from her way). But it would be very appropriate for a beginner. Also, she gives serge directions, if you’re using a serger (I wasn’t). There are accompanying pictures that illustrate the steps, and overall, it’s easy to follow.
What I Customized
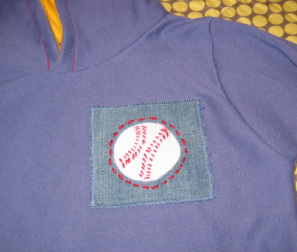
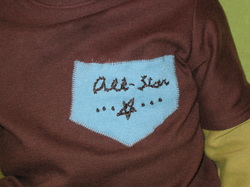
I decided to make a little baseball appliqué. So, this was my addition, there aren’t directions for this in the pattern. But there’s nothing to it: I just cut a piece of white felt into a circle and stitched it (by hand) to a square of denim. Then I took small stitches with a single strand of red yarn to mimic the stitches on a baseball (I actually had to Google images of baseballs to see what a baseball actually looked like!). I made a row of hand stitches with the red yarn just outside the baseball, and then I machine-appliquéd the piece of denim to the front.
I also added more top-stitching to the big yellow pocket, because I wanted to bring out the red. I top-stitched around the hood, too.
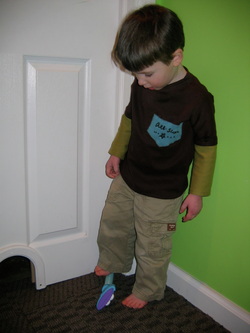
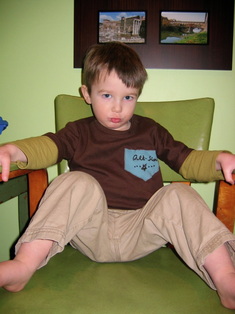
The Overall Fit
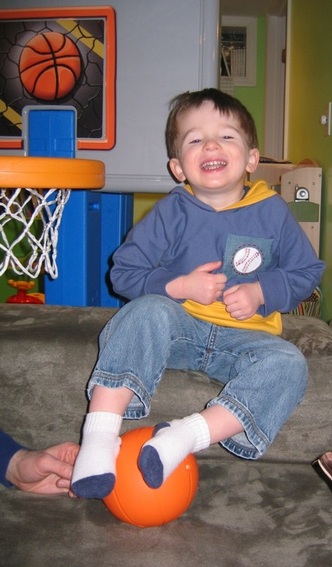
I made a 3T for Max, who is 2-1/2 years old, and a little bit on the small side (he’s like 35% percentile in height/weight). It’s just slightly big, but I like that, because there’s room to grow (I think it will still fit him this fall). It's a nice slim fit (and the waist cuff helps streamline it even more), but it's certainly not too tight. The only little thing: the neck opening is a bit snug. I like this from a fit perspective, but it does make getting it on and off him a bit tight (keep in mind, I did the hoodie version; I don’t think this would be an issue with the regular tee). It’s easier to flip it around and put his head in backwards and then flip it around to the front. When I make it again, I think I’ll cut the neckline just slightly bigger. But this is really no big deal.
The Charlie Tee & Hoodie is priced at $11.25. I know there are a lot of free patterns and tutorials online (which is awesome!), but it’s worth paying for a really great, well-designed pattern that you can use over and over again. I’ll certainly return to this one again, and will probably girl it up and make it for Georgia this fall, too!
Oh, one last thing: If you're nervous about working with knits, check out Bonnie's blog post answering questions about sewing knits


 RSS Feed